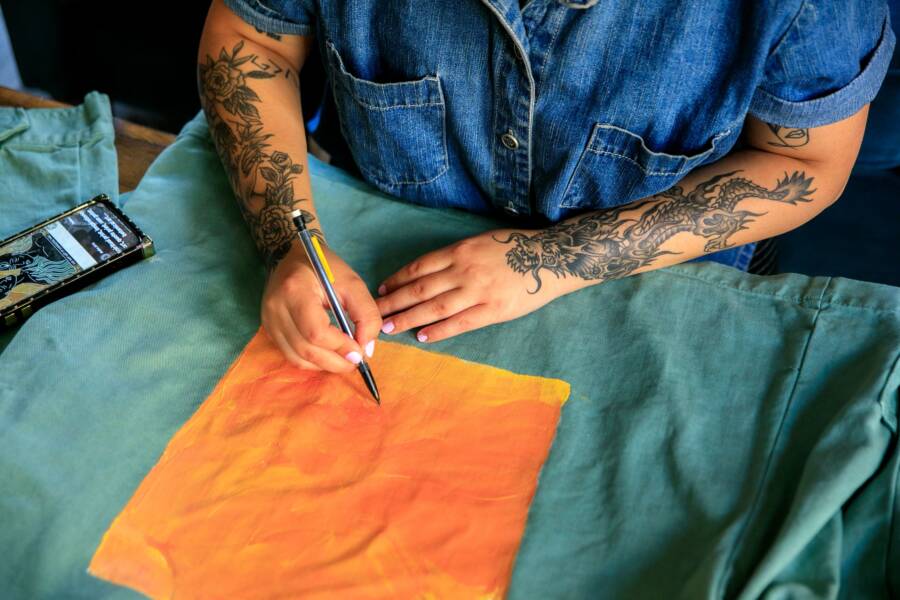
Stop rubbing the shirt, keep it flat, and lift excess paint with a clean, dull tool or paper towel. Don’t add water or heat until you know whether the paint is wet or dry.
The safest way to fix a fabric paint mistake on a finished shirt depends on the paint formula and the fabric, since the wrong solvent can spread the stain or damage the design. Follow the steps below to remove the excess carefully and treat the mark without setting it permanently.
Fabric Paint Mistake on a Finished Shirt: What to Do First
During the first five minutes, keep the shirt flat and remove any excess paint with a dull tool or clean paper towel. Blot the mark instead of rubbing it, place protection behind the fabric, and check the paint label before applying water or cleaner.
If the paint is still wet, lift it carefully without spreading the edges. Partially dried paint may soften with the correct cleaner, while fully dried paint often bonds more firmly to the fibers. Avoid ironing, machine drying, or hot water for now because heat can set some paint stains and make later removal more difficult.
Identify the Paint Before Choosing a Cleaner
Start with the paint container, even if the shirt was painted several days ago. Look for terms such as water-based, acrylic, puffy, dimensional, or solvent-based. The label may also list cleanup instructions, such as “clean with soap and water” or “use mineral spirits.” Follow those instructions rather than choosing a cleaner based only on the paint’s color or texture.
Water-based fabric paint is usually easier to soften, especially while it remains wet. Acrylic fabric paint may also be water-based before it dries, but dried acrylic can form a firm plastic-like layer that resists ordinary washing. Puffy paint and dimensional paint are often thicker, raised products that can catch on fabric fibers, so scraping or pulling at the edge may damage the shirt.
Solvent-based products require extra care because their recommended cleaner may affect the shirt’s dye, finish, or printed design. If the container does not identify the formula or cleanup method, don’t guess with strong solvents. Read the product’s safety and cleaning directions first.
Never combine cleaning products. Mixing bleach, ammonia, alcohol, acetone, or other cleaners can create dangerous fumes and may permanently damage the fabric.
Before treating the visible mark, test the chosen cleaner on an inside seam or another hidden area. Apply a small amount with a cotton swab, wait several minutes, then check for color loss, fading, stickiness, or fabric damage. If the test changes the shirt, stop and choose a gentler method.
Protect the Shirt While You Work
Slide a piece of cardboard, a folded towel, or several layers of absorbent cloth behind the stained area. This backing keeps loosened paint and cleaner from passing through the shirt and reaching the opposite side. It also gives you a stable surface while you blot.
Work on a flat table with the stained side facing up. If the paint is wet, use a clean towel or paper towel to lift it with short presses. Replace the towel as soon as paint transfers onto it, because a dirty section can move the stain back onto the fabric.
For a spot that has started to dry, begin at the outer edge and move toward the center. This direction keeps the stain from spreading into clean fabric. Use a dull butter knife, spoon edge, or plastic card to lift thick paint only when it has formed a layer above the fabric, and keep the tool nearly flat.
Apply cleaner sparingly after the hidden-area test passes. Blot the treated spot instead of scrubbing, and change the backing cloth whenever it becomes damp or stained. Once the paint stops transferring, let the area air-dry before deciding whether another treatment is safe.
How to Remove Wet Fabric Paint Without Spreading It
Wet fabric paint is easiest to remove before it dries, but rushed rubbing can turn a small mistake into a larger stain. Keep the shirt flat, support the fabric from underneath, and work in short, controlled treatments.
Check the paint label before adding water. Some water-based paints respond to cool water, while others specify lukewarm water or a particular cleanup product. Avoid heat, aggressive scrubbing, and full-garment soaking until you know how the paint and shirt react.
Removing a Small Drop or Thin Smear
For a small drop that still sits on the surface, use a spoon, plastic card, or another dull edge to lift the excess. Hold the tool nearly flat and slide it under the paint, moving toward the center of the mark. Wipe the tool after each pass so you don’t transfer paint back onto the shirt.
Place a folded towel or piece of cardboard behind the fabric. Then dampen a clean white cloth with water that matches the paint label, and dab the mark from the outside toward the center. Use short presses instead of wiping across the smear. Turn to a clean part of the cloth as soon as paint transfers.
If a faint film remains, apply one or two drops of liquid laundry detergent to the damp cloth, not directly to the shirt. Press the cloth against the spot for several seconds, then lift it away and check the transfer. Too much detergent can spread the softened pigment and leave a larger wet area.
Rinse the treated section carefully with the water temperature listed on the paint label. Before laundering the shirt, place a clean white towel beneath the spot and press the top with another damp white cloth. If pigment still transfers, repeat the short treatment instead of washing the garment.
Stop immediately if the shirt’s dye appears on the cloth, the printed design becomes tacky, or the fabric starts to feel rough or stiff. Blot away moisture, let the area dry, and reassess the cleaner and paint type.
Handling a Large Wet Spill on Cotton or Blends
A larger spill needs containment before cleaning. Keep the painted area facing upward, surround the edge with clean paper towels, and lift thick paint with a spoon or dull plastic edge. Do not press down on the spill, because pressure can force wet paint through the weave.
After removing the excess, read the paint label to choose the water temperature. When the label permits water cleanup, place the shirt with the stained side against a clean basin or towel and flush from the reverse side. This pushes loosened paint back toward the surface instead of driving it farther into the fibers.
Use brief rinses rather than soaking the entire shirt. Flush one small portion for a few seconds, inspect the runoff, and replace the towel or basin water when it becomes colored. Then apply a small amount of liquid laundry detergent to the remaining paint and dab from the reverse side or outer edge toward the center.
Rinse the area carefully and repeat only while paint continues to lift. Test an inside seam first if the shirt has a dark dye, screen print, embroidered design, or other finished decoration. Dark colors and printed areas can bleed when wet, even when the paint itself is water-based.
If the shirt color runs, the printed design softens, or the fabric changes texture, stop rinsing and remove the shirt from the water. Press it between clean towels to absorb moisture, then let it air-dry before choosing another treatment. Do not place it in a dryer while any paint or dye remains.
How to Treat Dried Fabric Paint on a Finished Shirt
Dried fabric paint usually needs to be softened and lifted in stages. Aggressive scraping can remove threads, roughen the weave, or leave a larger outline than the original mistake.
Keep the shirt flat with cardboard or a folded towel behind the painted area. Work only on the paint, check the fabric after every attempt, and stop if the shirt’s color, print, or texture begins to change.
Loosening a Thin, Cracked Layer of Paint
Start by gently flexing the shirt around the painted spot. Bend the fabric slightly in different directions, then release it. This movement can crack a thin paint film and separate loose flakes from the fibers without pulling hard on the shirt.
Lift any flakes with your fingernail, a plastic card, or a dull tool. Hold the edge nearly flat against the fabric and push under the paint with short, controlled movements. A plastic gift card or spoon edge is safer than a metal blade because it has less chance of cutting the weave.
Work from the outer edge toward the center of the mark. Remove only paint that lifts easily, and wipe the tool after each pass. If a flake resists, leave it in place rather than forcing it upward. Pulling can stretch the fabric or remove threads trapped beneath the dried paint.
A thin paint layer should come away in small pieces, not as a strip that requires force.
After each attempt, brush away loose flakes with a dry, clean cloth and inspect the area under good light. Look for pulled threads, fuzzing, color loss, or a hard paint outline. If the surface remains intact, you can continue with another gentle pass or move to a compatible cleaner listed on the paint label.
Dealing With Thick, Puffy, or Dimensional Paint
Raised paint needs extra care because its thicker surface can tear at the edges and leave a firm outline in the fabric. Puffy and dimensional products may also grip the weave more strongly than a thin, flat layer. Scraping across the entire raised area can flatten the fibers while leaving pigment behind.
First, remove only the loose portions with a fingernail, plastic card, or dull tool. Lift from several edges instead of prying up one large section. If the product maker lists a softening method, follow that method and use the recommended cleaner only after testing it on an inconspicuous area.
Apply a small amount to the paint, not the whole shirt, and wait for the label’s recommended dwell time. If no waiting time appears on the label, use a short application and inspect the spot often rather than allowing the cleaner to sit unchecked. Once the paint softens, lift it in several light passes, then rinse or blot according to the product directions.
Avoid high heat, sharp blades, and forceful scraping. Heat can set some residues or affect the shirt’s dye, while a blade can cut through the fabric even when the paint looks thick enough to remove. Rinse away loosened residue before repeating the treatment, and let the area dry between attempts so you can see whether the outline is fading.
Some dried paint bonds to the fibers and cannot be removed completely without damaging the shirt. When lifting stops and the fabric begins to suffer, stop treating the area rather than chasing a perfect result.
Which Cleaners Are Safe for Different Shirt Fabrics
The safest cleaner depends on both the paint formula and the shirt’s fiber content. A product that loosens acrylic paint on cotton can strip dye from polyester, weaken rayon, or damage silk. Check the care label and paint label first, then test the cleaner on an inside seam or hem before treating the visible mistake.
Cotton, Polyester, and Blended Shirts
Sturdy cotton usually tolerates repeated mild treatment better than most shirt fabrics. If the paint label allows water cleanup, use cool or lukewarm water and a small amount of liquid laundry detergent. Blot the softened paint with a clean white cloth, rinse the area carefully, and let it dry before deciding whether another pass is needed.
Denim is also cotton, but its indigo dye can transfer or fade during spot cleaning. Use less moisture than you would on a plain white cotton shirt, and test the cleaner inside the waistband or along an inner seam. A cleaner that removes the paint may also leave a pale ring or lighter patch around the mistake.
Polyester often resists water-based paint because its fibers absorb less moisture than cotton. That resistance doesn’t make polyester safe for strong solvents, however. Acetone, paint thinner, and other aggressive products can affect the fiber, coating, color, or printed finish. Use a mild detergent first when the paint label permits it, and apply any stronger cleaner only if the manufacturer specifically recommends it for the paint and fabric.
Cotton-polyester blends require the more delicate fiber to guide the treatment. For example, a blend with rayon, spandex, or another sensitive fiber needs the same caution as that fiber, even when the cotton portion seems sturdy. Read the full fiber content instead of treating the shirt as pure cotton.
A hidden-spot test is essential because fiber labels cannot show how a particular dye or finish will react. Apply one drop of the proposed cleaner to an inside seam, wait several minutes, then press the spot with a white cloth. Stop if you see dye transfer, whitening, stickiness, stiffness, or a change in texture.
Test the cleaner on a hidden area even when the product is labeled fabric-safe. “Fabric-safe” doesn’t guarantee compatibility with the shirt’s dye, print, or finish.
Delicate, Stretch, and Dark-Colored Fabrics
Rayon, silk, and wool need more caution than cotton because moisture and friction can change their structure. Rayon may distort, shrink, or develop a water mark when you wet one small area. Wool can felt or become rough when exposed to rubbing, heat, or the wrong solvent. Silk may lose color, develop rings, or suffer a lasting change in its smooth surface.
For these fabrics, use gentle blotting with a clean, barely damp cloth only when the care label and paint instructions permit it. Don’t soak the shirt, scrub the paint, or scrape across the weave. If the mark is large, fully cured, or located near embroidery, foil, screen printing, or another finished design, take the garment to a professional cleaner and identify the paint used.
Stretch shirts require the same care because spandex fibers can weaken when exposed to solvents, heat, or prolonged chemical contact. Keep the fabric relaxed on a flat surface while you blot, since pulling the shirt can spread the paint and leave the area permanently distorted. Avoid stretching the stained section to inspect it.
Dark garments show damage quickly, even when the paint residue becomes lighter. A cleaner may remove dye and leave a white or faded halo around the original mark. Test for color loss with a cotton swab or white cloth, and stop at the first sign of dye transfer.
Professional cleaning is the safest choice for silk, wool, rayon, expensive shirts, and garments with water-repellent, brushed, coated, or specialty finishes. Tell the cleaner that fabric paint is involved, whether it is wet or cured, and which products you have already applied. Further home treatment can make the paint harder to remove and may limit the options available to a professional.
When Rubbing Alcohol, Acetone, or Commercial Removers Make Things Worse
Strong cleaners can loosen dried fabric paint, but they can also remove the shirt’s dye, soften a printed design, or damage the fibers beneath the stain. Rubbing alcohol may affect some dyes and finishes, while acetone can damage acetate and certain synthetic fibers. Commercial paint removers vary widely, so check their fabric compatibility before applying them to a finished shirt.
Use the least aggressive product that matches the paint label and fabric care label. If the paint container doesn’t recommend a solvent, don’t guess. A small stain is easier to accept than a large faded patch, melted area, or damaged design.
How to Perform a Hidden-Spot Compatibility Test
Choose an inside hem, seam allowance, or another area hidden during normal wear. The test area should contain the same fabric, dye, and finish as the visible part of the shirt. Avoid testing only on a white care-label section, since it may react differently from the garment.
Follow these steps before treating the stain:
Place a clean white towel behind the hidden area.
Dip a cotton swab into a small amount of the proposed cleaner.
Touch the swab to a spot no larger than a pea.
Leave the product in place for five to ten minutes, unless the product label gives a shorter contact time.
Press the area with a clean white cloth, then inspect it under bright light.
Look for dye on the cloth, fading, whitening, bleeding, or a sharp color change. Also check whether the fabric feels stiff, rough, sticky, swollen, thin, or brittle. If the shirt has a coating or printed decoration, watch for tackiness, cracking, lifting, or color on the cotton swab.
A passing test doesn’t mean the cleaner is safe for unlimited use. It only shows that the tested amount and contact time caused no visible problem in that location. Apply the product sparingly to the paint, keep the treatment localized, and stop if the fabric begins to change.
Rubbing alcohol deserves caution on dark or brightly dyed shirts because it can pull color from some fabrics. Acetone requires even more care, since it can damage acetate and may affect certain synthetic fibers, coatings, prints, or trims. A commercial remover is only appropriate when its label confirms compatibility with the shirt’s fiber and finish.
Signs You Should Stop Using a Home Cleaner
Stop immediately if you notice any of these changes:
A wet halo spreads beyond the original paint mark.
The shirt color fades, lightens, or appears on the cloth.
The fabric becomes rough, stiff, sticky, thin, or brittle.
Fibers look melted, puckered, fused, or unusually shiny.
A printed, embroidered, or coated design softens, lifts, cracks, or transfers color.
Strong fumes develop, especially in a small or poorly ventilated room.
The cleaner causes heat, bubbling, discoloration, or an unexpected reaction.
Stopping early can preserve the shirt even when some paint remains. A permanent paint spot may be less noticeable than a solvent ring surrounding it, and a clean-up attempt that damages the weave cannot be reversed.
Move the shirt away from heat and flames if you smell strong solvent fumes. Never use rubbing alcohol, acetone, or another solvent near a candle, gas burner, cigarette, pilot light, or running heat source. Work only with good ventilation, and never mix a solvent with bleach, ammonia, detergent, or another cleaner.
If the product label permits rinsing, rinse the treated area exactly as directed. Otherwise, blot away excess product with a clean cloth and follow the label’s disposal and first-aid instructions. When fading, fiber damage, or a spreading halo appears, stop home treatment and contact a professional cleaner. Tell the cleaner which product you used and how long it remained on the shirt.
How to Remove the Paint Shadow After the Main Stain Is Gone
A remaining paint shadow needs a careful inspection before another treatment. The outline may contain leftover pigment, but it can also result from cleaner residue, dye loss, or a changed fabric surface. Wash with a suitable detergent only when the paint label and shirt care label allow it, then inspect the area before repeating any treatment.
Checking for Residue Before Washing
Run your fingertips lightly over the spot while the shirt is dry. Stiffness, tackiness, or a raised texture suggests that paint or cleaner residue remains. A smooth area with only a color change may indicate that pigment soaked into the fibers or that the cleaner altered the fabric surface.
Inspect the shirt under bright, indirect light. Turn it inside out and examine the reverse side as well, since paint can remain within the weave even when the front looks mostly clean. If the area looks darker, shiny, or rough from one side, avoid adding more cleaner until you understand what changed.
Follow the care label and the paint manufacturer’s washing instructions. When washing is permitted, use the recommended water temperature and a suitable mild detergent. Keep the shirt out of the dryer until the mark and any cleaner residue are gone, because heat can set remaining pigment and make a ring or shadow harder to remove. Let the shirt air-dry so you can inspect the true result.
Avoiding a Permanent Ring or Halo
A ring can form when excess cleaner dries at the edge of a wet spot. Hard-water minerals may also remain in the fibers, while repeated wetting can move pigment outward and create a pale or dark outline. Use only a small amount of cleaner, and avoid soaking beyond the affected area.
If the care label allows it, lightly blend the damp edge into the surrounding fabric rather than leaving a sharply defined wet boundary. Rinse thoroughly to remove detergent and cleaner, then press the area between clean towels. Air-dry the shirt naturally and inspect it again under bright light.
Repeat treatment only when the fabric still feels smooth and looks unchanged. A faint outline may be permanent discoloration, not leftover paint, so further cleaning could enlarge the damage instead of removing the shadow.
What to Do If Paint Removal Damaged the Shirt
If the paint lifted but left bleaching, rough fibers, a pulled thread, or a clear outline, stop applying cleaner. Further treatment may enlarge the damaged area, so the next step is to decide whether the shirt needs a design change, a small repair, or professional care.
Let the spot dry naturally before judging it. A wet area can look darker or more noticeable than it will after drying, while cleaner residue can create a temporary ring. Once dry, inspect the front and back of the fabric under bright light, and check whether the damage affects only the color or also the shirt’s texture.
A repair should match the shirt’s fiber content and care instructions. Any marker, patch, appliqué, or new paint must remain secure after washing, and it should not require heat that could damage the existing design.
Covering the Mistake With a Planned Design
A damaged spot can become part of the artwork when removal has left discoloration but the fabric remains smooth and intact. Expand the design with a balanced shape, a border, a repeating pattern, an outline, or a painted detail that makes the original spot look deliberate. For example, a small bleached area may work as the center of a flower, part of a geometric panel, or one element in a larger illustrated design.
The new artwork should relate to the shirt’s existing colors, scale, and placement. A random patch of paint often looks like a quick cover-up, especially when its edges stop abruptly or the design sits off-center. Repeat a color, line, or shape elsewhere on the shirt so the addition appears planned rather than added only to hide damage.
Before touching the shirt, draw the proposed design on paper or make a simple template. Then test the same paint, fabric marker, appliqué, or stitching on a scrap fabric with a similar fiber content and color. Check the coverage, edge quality, drying time, and texture after the material fully dries.
Apply the design only after removing all loose paint and cleaner residue. Allow the new paint to cure completely according to the product label before washing the shirt. Air-dry the finished garment first, then wash it using the gentlest care method allowed by both the shirt and the paint.
When a Tailor or Professional Cleaner Is the Better Choice
Contact a professional when the shirt contains silk, wool, rayon, leather trim, specialty coatings, or a high percentage of stretch fiber. A tailor or cleaner is also the safer choice for an expensive garment, a large cured stain, chemical damage, or paint close to a seam, zipper, collar, cuff, printed graphic, or embroidery. These areas can distort or lose their shape when you scrape, stretch, or wet them.
A tailor is usually more useful when the fabric has a pulled thread, torn area, frayed edge, or hole. A professional cleaner may help with remaining paint or chemical residue, but cleaning cannot restore fibers that have been cut, melted, or bleached. If the fabric feels rough, thin, stiff, or brittle, stop testing new products at home.
Give the professional clear information before treatment begins. Bring or photograph the paint container, and provide the following details:
The paint brand and product type, if known.
The shirt’s complete fiber content and care label.
Every cleaner or solvent you applied.
Approximately when the paint mistake and removal attempt occurred.
Whether the shirt has already been washed, dried, ironed, or exposed to heat.
Any changes you noticed, such as fading, roughness, tackiness, or pulled threads.
Don’t hide earlier treatment, even if you think it made the problem worse. The products already used can affect which cleaning or repair methods remain safe. If the paint has come off but the shirt now has bleaching or a visible outline, ask whether recoloring, embroidery, an appliqué, or a replacement panel is more realistic than continued stain removal.
How Washing and Heat Affect a Repaired Shirt
Washing can remove loosened water-based residue, but it can also spread pigment or set some stains permanently. Use the care label and paint instructions together, then keep the shirt away from an iron and dryer until you have confirmed that the mistake is gone.
A Safe First Wash After Treatment
Rinse out the cleaner according to the product instructions before placing the shirt in a washing machine. Leftover solvent, detergent, or loosened pigment can spread during the wash if it remains concentrated in the treated area. Use cool or lukewarm water only when the paint and care labels allow it.
Wash the shirt by itself or with similar colors on the gentlest cycle permitted by the care label. Don’t add towels, fleece, denim, or other items that could pick up loose pigment and transfer it back onto the shirt. If the paint mark is still releasing color, a separate wash gives you better control and protects other garments.
Turn the shirt inside out before washing when the care label permits it. This reduces direct friction against the repaired surface, especially when the shirt has a printed design or a newly treated area. Avoid chlorine bleach unless the care label and the garment’s fiber content specifically permit it, since bleach can remove the shirt’s dye and may worsen a visible patch.
Inspect the shirt while it is still damp, but don’t stretch the treated area to examine it. Check both sides for remaining paint, a spreading halo, stiffness, or color transfer. If the paint remains, stop before drying and reassess the product instructions rather than running another wash automatically.
If the area looks clean, air-dry the shirt according to its care label. Lay it flat when the label calls for flat drying, or hang it on a suitable hanger when hanging is allowed. Keep the shirt away from direct heat while it dries so you can judge the final color and texture without setting hidden residue.
A normal wash may remove softened water-based residue, but it usually won’t dissolve cured fabric paint that has already bonded to the fibers.
When Heat-Setting Helps and When It Hurts
Heat-setting belongs after a successful fabric-paint design is complete, not during stain removal. Many fabric paints require an iron or dryer to cure the intended artwork, but that instruction applies only when the paint is placed where you want it and the surface is clean.
An iron can make an accidental paint mark harder to remove by curing the paint against the fibers. A dryer can have the same effect, especially when residue remains inside the weave. Heat may also soften paint enough to transfer it to another section of the shirt, the dryer drum, or nearby trim.
For that reason, don’t iron over a treated area or place the shirt in a dryer while any paint, cleaner residue, or discoloration remains under review. Air-drying gives you time to inspect the result and decide whether another treatment is safe. It also prevents heat from turning a removable mistake into a more permanent finish.
Follow the paint manufacturer’s heat-setting directions only after you intentionally repaint or complete the design. Use the temperature, time, protective cloth, and pressing method listed on the product label. If the shirt’s care label prohibits that level of heat, choose a paint product and curing method compatible with the garment instead of applying heat by guesswork.
How to Prevent Another Fabric Paint Mistake on a Finished Shirt
A safer painting routine starts before you open the paint. Prepare the work surface, confirm the paint’s curing instructions, and keep the shirt stable throughout the project. These steps limit spills and help you spot problems before the design becomes permanent.
Set Up a Safer Painting Workspace
Cover your table with a washable vinyl mat, plastic tablecloth, or other nonporous surface. Place a piece of cardboard, a cutting mat, or several layers of scrap fabric inside the shirt. This barrier prevents paint from soaking through to the back and keeps the front and back of the garment from sticking together.
Use a bright lamp so you can see thin lines, wet edges, and stray drops before they dry. Open a window or work in a space with adequate ventilation, especially when the paint label recommends it or an approved cleaner has a noticeable odor. Keep water or the cleaner named on the paint label within reach, but don’t place open containers where your sleeve could knock them over.
Disposable gloves help when the paint or cleaner may irritate your skin. Use separate brushes, palettes, or mixing tools for different colors when possible. Clean tools before switching colors, or label them for one color only. This prevents muddy color transfer and reduces the chance that a brush carrying excess paint will leave an unwanted mark.
Keep clothing, upholstered furniture, food, and electronics away from the table. If the shirt needs to remain wet, place it on a level drying tray or protected shelf where children, pets, sleeves, and loose fabric cannot touch it. Preparation turns a spill into a contained cleanup instead of a second shirt stain.
Know When the Shirt Is Truly Finished
Surface-dry paint feels dry when you touch it lightly, but the layer underneath may still contain moisture. A design can look complete while remaining soft, tacky, or vulnerable to pressure. Folding the shirt at this stage can transfer paint to another section or leave a permanent crease in the design.
Full curing takes the time stated on the paint label. Until that time passes, don’t fold, wash, iron, or wear the shirt unless the manufacturer specifically permits it. Some products require air-drying, while others include separate instructions for heat-setting. Follow the product directions and the shirt’s care label together, since the garment may not tolerate the recommended heat.
Check the design at the end of the listed curing period. It should feel dry and stable, without tackiness or color transfer when you lightly press a clean white cloth against an inconspicuous edge. If the paint still feels soft, give it additional drying time rather than testing it with a wash or iron.
Photograph the finished shirt before storing it. Keep the paint container, care instructions, and a note of the colors used with the photo. Later, these details can help you match a repair, identify the correct washing method, or avoid applying an incompatible product to the design.
Conclusion
Identify the paint before choosing a cleaner, then act quickly if the mark is still wet. For dried paint, soften and lift it in small steps, testing every product on a hidden area first. Keep heat away until the shirt is clean and fully inspected.
The strongest result comes from protecting the fabric, not forcing out a stubborn stain. If removal begins to cause fading, roughness, or a halo, stop and either make the mark part of a planned new design or take the finished shirt to a professional.