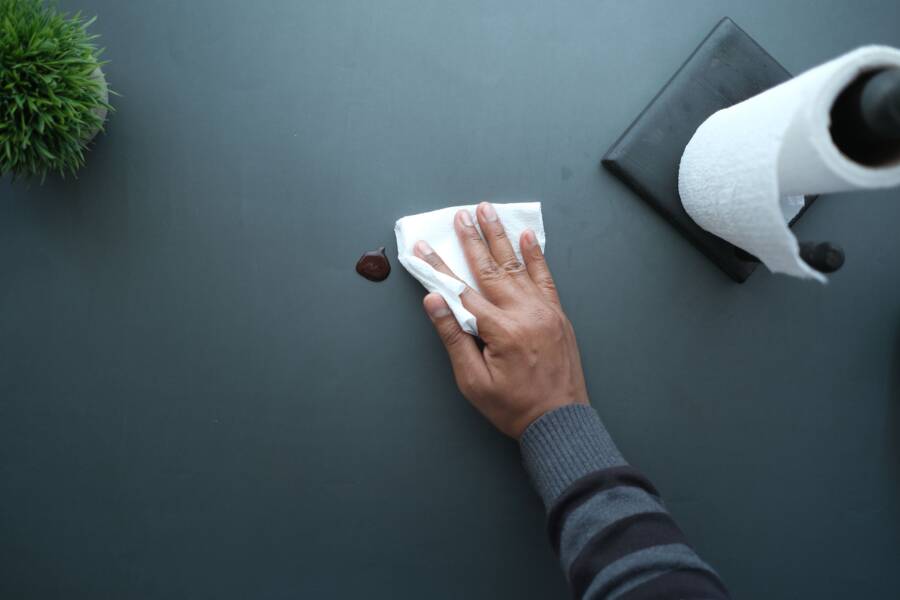
Blot wet remover immediately with a clean cloth, avoid rubbing, and don’t add more solvent. A nail polish remover stain on a wood table may affect only the finish, or it may reach the bare wood underneath.
Acetone can soften, whiten, cloud, or strip varnish, lacquer, shellac, paint, and some polyurethane finishes. The safest repair depends on what was damaged, so follow the steps below before cleaning, sanding, or applying any product.
Nail Polish Remover Stain on a Wood Table: What Happened?
Nail polish remover is not a normal surface cleaner. Acetone-based formulas can react with a table’s protective coating within seconds, especially when the finish is old, thin, or already worn.
The liquid may leave a temporary residue that sits on top of the finish. It may also soften the coating, creating a dull ring, sticky patch, white haze, or uneven shine. If the liquid passes through the coating, the exposed wood can develop a pale area, dark edge, rough grain, or color change.
These are different problems and need different treatments. A surface residue may need gentle wiping, while a damaged finish may need touch-up work. Wood that has absorbed the remover may require careful smoothing, color matching, and refinishing.
Before choosing a repair method, identify the table’s finish. A glossy factory table often has polyurethane or lacquer, while an older piece may have shellac, wax, oil, or painted wood. When the coating is unclear, use the least aggressive method first.
What to Do Immediately After the Spill
Move nearby objects away from the spill so they don’t become contaminated. Place a clean, absorbent cotton or microfiber cloth over the liquid, then press gently without dragging it across the tabletop.
Work from the outside edge toward the center as you blot. This keeps the wet area from spreading into clean wood. Replace the cloth when it becomes saturated, and continue until no liquid transfers easily.
Let the area dry naturally with the room well ventilated. Don’t scrub, use a hair dryer, place a fan close to the wet spot, or apply water to dilute the remover. Keep acetone away from candles, gas burners, cigarettes, children, and pets.
Acetone evaporates quickly, but its damage to a finish can continue while the coating remains soft.
Don’t try to cancel the remover with vinegar, rubbing alcohol, oil, or another chemical. Mixing products can create a larger affected area and make the final repair harder to match.
How to Check Whether the Wood Finish Is Damaged
Inspect the tabletop under bright, indirect light after it has dried. Look across the surface from several angles because a damaged clear coat may appear normal when viewed straight on.
Run one clean fingertip lightly across the spot. A sticky, soft, rough, or raised texture suggests that the finish changed. A dull ring, cloudy patch, missing color, or visible wood grain also points to coating damage rather than simple residue.
Compare the area with the surrounding table. If the wood looks sealed and feels smooth, the remover may have left a surface film or mild sheen change. If the grain feels exposed or absorbs a tiny drop of water quickly, the protective layer may be missing.
Test every cleaning or repair method on an unseen edge first. The underside, back edge, or area beneath a removable component can show how the finish reacts. Don’t treat the tabletop as bare wood unless the finish has clearly disappeared.
Safe Ways to Remove a Light Residue From Finished Wood
Start with a dry microfiber cloth and very light pressure. Wipe in the direction of the grain, then stop if the cloth catches, the surface becomes duller, or the color begins transferring.
If a thin residue remains and the finish looks intact, use a cloth barely dampened with water and one drop of mild dish soap. Wring the cloth until it feels almost dry, wipe a small section, and immediately dry it with another cloth.
Use very little moisture because water can enter seams, worn edges, and open grain. Never pour cleaning solution directly onto the table. Repeat one gentle pass only when the first pass produces improvement.
Rubbing alcohol, vinegar, acetone, abrasive powders, magic erasers, and household polish are poor automatic choices. Each can react differently with lacquer, shellac, wax, paint, or older clear coats. If gentle wiping doesn’t remove the mark, stop rather than escalating to a stronger cleaner.
How to Repair a Cloudy or Dull Spot on the Table
A cloudy spot usually indicates finish-level damage, not a stain deep inside the wood. The remover may have changed how the coating reflects light, leaving a patch that looks white, gray, hazy, or flatter than the surrounding surface.
Very mild damage may respond to careful hand buffing with a clean, soft cloth. Avoid pressure and avoid polishing compounds unless the product specifically suits the table’s finish. Aggressive rubbing can thin the coating and enlarge the visible patch.
A compatible furniture finishing product may help, but the existing coating must be identified first. Follow the label, apply thin coats, and allow the stated drying time between applications. Test the product on a hidden area before touching the mark.
Stop if the patch becomes sticky, larger, darker, or more reflective than the rest of the table. Those changes show that the new product is reacting poorly or building an uneven film. At that point, a small finish touch-up may be safer than further cleaning.
What to Do When Nail Polish Remover Reaches Bare Wood
Exposed wood can show a pale patch, dark border, rough fibers, or a different sheen after the liquid dries. The mark may also follow the grain because the remover traveled through a worn section of finish.
First, remove only loose residue with a dry cloth. Give the wood a full day to dry before sanding or applying color, especially if the spill was large. Rushing into repair can trap residue beneath a new stain or coating.
If fibers remain raised, smooth them lightly with fine 320-grit sandpaper or a finer grade. Keep the sanding inside the damaged area and use only a few controlled strokes. Aggressive sanding can create a low spot, expose more wood, and remove the surrounding finish.
Test any stain or finish on scrap wood with a similar color, or on a hidden part of the table. Apply a small amount at a time and compare it after drying. Color matching is difficult because the original wood may have aged, faded, or darkened.
When Home Remedies Can Make the Damage Worse
Adding more acetone is one of the fastest ways to enlarge the mark. It may remove remaining polish, but it can also dissolve more of the finish and push the liquid farther across the surface.
Steel wool can scratch a clear coat and leave a dull patch that catches the light. Toothpaste and baking soda are abrasive, even when they feel mild on a fingertip. They can remove sheen from a finished tabletop.
Soaking the area may cause swelling around joints or veneer edges. A hair dryer can soften some coatings unevenly and may drive liquid toward seams. Heat also makes it harder to judge whether the surface has fully dried.
Oils and furniture polishes can hide the damage for a short time while leaving a film that interferes with refinishing. A method that works on one coating may dissolve another. Stop DIY treatment when the finish lifts, the damage spreads, or the table has significant value.
How to Match the Repair to the Table’s Finish
Polyurethane forms a durable film, but acetone can still dull, soften, or mark it. A glossy modern table often needs a small spot repair that blends new finish into the existing coating. Matching sheen is as important as matching color.
Lacquer and shellac react quickly to many solvents, so repeated wiping can remove more material. Shellac may also show a sharp boundary between the damaged and undamaged areas. These finishes often require a skilled touch because a small solvent mistake can widen the repair.
Painted wood may lose its topcoat or color, while waxed wood can develop a lighter patch when the wax is removed. Oil-finished wood may show a dry or uneven area after exposure. Each surface needs products intended for that coating, not a universal remedy.
Check the table maker’s care instructions, an existing care label, or paperwork from the retailer. If those details aren’t available, ask a furniture professional before applying a new coating. Don’t seal unknown residue under varnish, polyurethane, or wax.
When to Call a Furniture Repair Professional
Contact a furniture repair professional when the spill covers a large area or leaves a dark, deep, or spreading mark. Peeling finish, damaged veneer, exposed edges, and a visible low spot also justify professional help.
A valuable antique needs extra caution because its finish may be original. Veneer can be thin enough that ordinary sanding removes it quickly. An uneven home repair may become more noticeable than the original acetone mark.
A professional may clean the surface, blend the color, repair veneer, or refinish the affected section. They can also identify the coating through the table’s age, construction, and finish behavior. That assessment prevents incompatible products from being layered over the damage.
Take clear photographs in daylight and include a close view and a wider view. Share the table’s approximate age, material, maker if known, and any information about its finish. Mention how much remover spilled and what you have already applied.
How to Prevent Another Nail Polish Remover Spill
Do manicures on glass, silicone, metal, or another nonporous work surface. A washable protective mat gives you a safer barrier than a towel alone. Cotton pads and polish bottles should stay away from the table’s finished surface.
Keep the remover upright and capped whenever you’re not using it. Place used cotton pads in a lined container with a secure lid instead of leaving them on the tabletop. Acetone-soaked pads can continue contacting the finish after the bottle is closed.
A coaster or folded towel may absorb some liquid, but neither reliably prevents acetone from reaching wood. Use a tray with a nonporous base if you must work near furniture. Keep the bottle away from flames and heat sources during use and cleanup.
Wipe any future spill as soon as you notice it, then follow the table maker’s cleaning instructions. Don’t store remover in a place where a child or pet can knock it over. A few seconds of careful setup can prevent a repair that takes much longer.
Conclusion
Blotting is the safest first response to a nail polish remover stain on a wood table. Light residue may need only a dry cloth or a barely damp cloth with mild soap, while a cloudy or stripped patch usually needs finish repair instead of stronger cleaning.
If bare wood is exposed, let it dry fully before considering light sanding and color testing. Valuable, veneered, antique, badly marked, or uncertain surfaces deserve professional assessment before you apply anything else.
The best repair starts by identifying what changed: the residue, the finish, or the wood itself. Stop experimenting when acetone damage keeps spreading, because a furniture professional can often repair a contained spot more cleanly than an enlarged one.