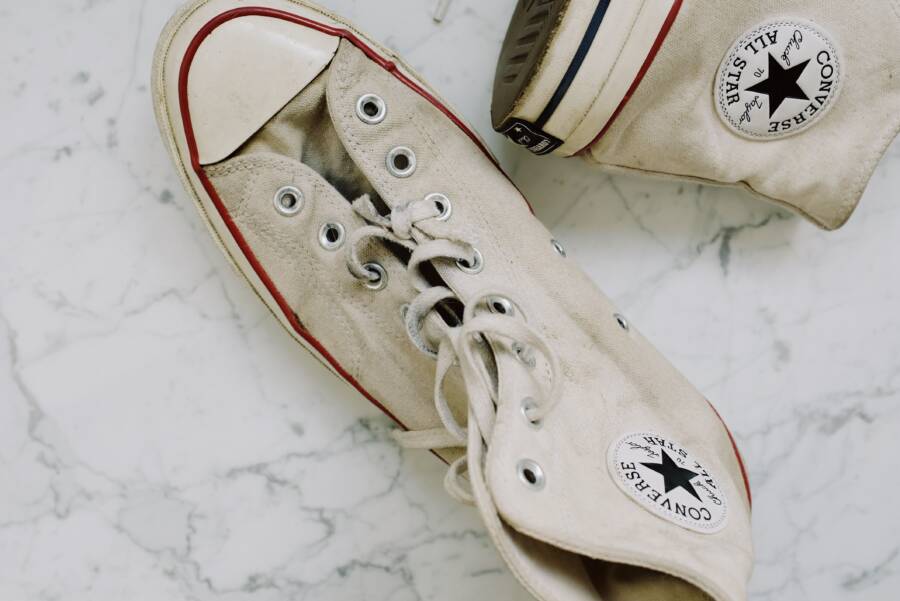
Can You Use Sharpie on White Canvas Shoes
Yes, you can use Sharpie markers on white canvas shoes, but the ink bleeds easily and fades over time without the right prep work. Permanent markers contain alcohol-based solvents that spread quickly across untreated cotton fabric, turning clean lines into blurry smudges.
What Happens When You Use Sharpie on White Canvas Shoes
Applying permanent markers to fabric introduces a complex chemical reaction. The porous nature of cotton fibers pulls the liquid pigment outward from the original contact point.
Why Ink Bleeds on Fabric
Canvas material consists of woven cotton threads that act like tiny straws. When alcohol-based ink touches the shoe, capillary action pulls the liquid deep into the fibers. The solvent spreads outward in a circle before it evaporates. This movement turns a sharp pen stroke into a fuzzy, blurred stain on the surface of the shoe.
Preventing this spread requires a barrier that slows down absorption. Fabric medium or rubbing alcohol applied beforehand controls how fast the threads soak up the pigment. Without this step, fine details disappear into the surrounding weave within seconds.
The Fading Problem in Sunlight
Ultraviolet rays from the sun constantly bombard outdoor gear. These light waves break down the chemical bonds inside marker pigments over time. Black permanent ink absorbs light across the entire spectrum, which makes it particularly vulnerable to photodegradation.
As the pigment molecules break apart, the black color shifts into unwanted undertones. The dye often turns into a dull purple, blue, or magenta after a few weeks of outdoor exposure. Applying a UV-resistant clear coat over the dried artwork helps shield the pigment from direct sunlight.
How to Prepare Your Shoes Before Drawing
Getting your shoes ready takes just a few minutes, but skipping this step ruins the finished artwork. Canvas shoes collect dust, body oils, and invisible factory coatings that block marker ink from sticking properly. Cleaning the surface removes these barriers so the pigment binds directly to the cotton fibers.
Cleaning Away Dirt and Residue
Paint or ink applied over dirty shoes peels off easily because the pigment attaches to grime instead of the fabric. Start by brushing off loose dirt with a dry, soft-bristled brush. Mix a few drops of dish soap with warm water in a small bowl. Dip a clean toothbrush into the soapy water and scrub the entire shoe surface in circular motions. Wipe away the dirty foam with a damp microfiber cloth. Allow the shoes to dry completely for at least twelve hours before you pick up any markers.
Stuffing the Shoes to Keep Shape
Soft fabric flexes and bends under the pressure of a marker tip, which makes drawing straight lines nearly impossible. Stuffing the interior creates a firm, stable surface that pushes the canvas outward. Crumple up old newspaper or paper towels and pack them tightly inside the shoe until the material stretches smooth. This simple trick eliminates wrinkles and gives you a flat canvas to work on. Keep the stuffing inside the shoes until the ink dries completely.
Techniques for Getting Clean Lines Without Bleeding
Keeping ink exactly where you want it on canvas requires a controlled approach to fluid dynamics. Fabric fibers absorb liquids eagerly, so you need specific methods to stop the marker bleed before it starts.
Using Rubbing Alcohol for Watercolor Effects
You can blend marker ink intentionally using isopropyl alcohol for a cool tie-dye or watercolor look. Applying high-concentration rubbing alcohol to fresh Sharpie ink breaks down the pigment binders instantly. The alcohol pushes the color outward in soft, organic gradients instead of crisp shapes.
Draw your primary outlines on the canvas using a dry marker.
Dip a fine paintbrush into ninety-one percent isopropyl alcohol.
Touch the wet brush directly to the edge of the ink lines to watch the pigment bloom outward.
Dab away excess liquid with a paper towel if the color spreads too fast.
Control is everything when you mix alcohol with permanent ink. Too much liquid creates muddy gray puddles, while a dry brush leaves the ink stubborn and unblended. Work in small sections so you can manage how far the color travels across the weave.
Choosing the Right Marker Tip Size
Fine-point versus ultra-fine markers serve very different purposes when outlining versus filling in large areas of color. Ultra-fine markers feature plastic needle points that lay down thin, controlled lines without flooding the surrounding threads. These thin tips work best for intricate patterns, lettering, and sharp borders. Fine-point markers feature bullet-shaped felt tips that release a heavier volume of ink with every pass.
Use ultra-fine markers for all initial line art and detailed sketches.
Switch to fine-point markers only when you need to color inside closed boundaries.
Keep the marker moving at a steady pace to prevent ink pooling in low spots of the canvas weave.
Thick tips deposit too much solvent at once if you press down too hard. Holding the marker at a low angle distributes the ink evenly across multiple cotton threads instead of sinking a heavy pool into a single spot.
How to Seal and Protect Your Custom Artwork
Protecting marker art on canvas shoes stops the pigment from washing away in the rain or smudging against pavement. Permanent markers need an extra barrier because alcohol solvents break down when they contact water or friction.
Applying Fabric Medium or Sealant Spray
Liquid acrylic sealant and heat setting lock ink pigments directly into cotton fibers. Spray-on sealants create a flexible, water-repellent shield over the entire shoe surface without changing the texture of the canvas.
Take your shoes outside or work in a well-ventilated garage.
Hold an aerosol acrylic sealer about eight inches away from the canvas.
Spray a thin, even coat across the decorated areas of the shoe.
Allow the first coat to dry for twenty minutes.
Apply a second light coat to ensure complete coverage over every drawn line.
Let the shoes cure undisturbed for twenty-four hours before wearing them.
Heat setting works best when you mix acrylic fabric medium directly with your marker ink or apply it over the finished design. Set your household iron to the cotton setting without steam. Place a thin cotton pressing cloth over your artwork to protect the fabric. Press the iron firmly against the cloth for thirty seconds across each section of the shoe. This high heat cures the polymers in the ink and bonds the pigment permanently to the threads.
Testing for Water Resistance
Testing your finished shoes before stepping outside prevents unexpected smudges during a rainstorm. Water droplets reveal weak spots in your sealant barrier immediately.
Dip your fingertips into clean tap water.
Flick a few drops directly onto an inconspicuous part of your sealed artwork.
Wait for sixty seconds to see how the canvas reacts to the moisture.
Blot the water gently with a clean white paper towel.
Inspect the paper towel for any traces of colored ink or marker residue.
If the paper towel stays completely white, your sealant barrier is strong enough for daily use. Any sign of color transfer means the ink is still water-soluble. Let the shoes dry completely, then spray another coat of acrylic sealer over the entire design. Always complete this water test before wearing your custom shoes outdoors for the first time.
How to Fix Mistakes or Remove Marker Ink
Mistakes happen when you draw on canvas shoes, but permanent ink is surprisingly easy to correct with the right solvents or cover-up methods. Permanent markers bond strongly to cotton fibers, so simple water washing will not lift the pigment. You need targeted chemical removal or physical coverage to fix stray lines and unwanted smudges.
Erasing Lines with Acetone or Alcohol
Dabbing high-strength solvents onto unwanted marks lifts the pigment out of the canvas fibers. Isopropyl alcohol or acetone breaks down the chemical binders in permanent ink so the color releases from the cotton threads.
Dip a cotton swab into ninety-one percent isopropyl alcohol or pure acetone.
Press the wet swab directly onto the mistake without rubbing the fabric.
Hold the swab in place for ten seconds to let the solvent dissolve the ink bond.
Blot the area with a clean white paper towel to absorb the loosened pigment.
Repeat this process with a fresh swab until the ink stops transferring to the paper towel.
Solvents often push the dissolved ink outward into a faint halo shape if you use too much liquid at once. Work carefully in small areas and keep a dry towel ready to catch the bleeding color immediately.
Painting Over Errors with Fabric Paint
White fabric paint acts as an eraser to cover up stray ink marks completely when solvents fail to lift the pigment. Canvas fabric has a textured weave that holds opaque paint very well, creating a solid barrier over dark mistakes.
Stir a jar of heavy-duty white acrylic fabric paint until the consistency is smooth.
Dip a small, flat artist brush into a tiny amount of paint.
Apply a thin layer directly over the unwanted marker line using gentle dabbing motions.
Let the first layer dry completely for twenty minutes.
Paint a second thin coat over the area if any dark ink still shows through the white pigment.
Opaque fabric paint hides mistakes permanently without leaving a stiff plastic crust on your shoes. Blend the edges of the painted spot into the surrounding canvas so the patch remains invisible from a distance.
Caring for Your Custom Shoes Over Time
Proper maintenance keeps your custom artwork intact and prevents the canvas from breaking down prematurely. Because permanent marker ink bonds to the cotton fibers, harsh cleaning methods strip away the pigment and ruin the design. Following a strict care routine preserves the colors and extends the lifespan of your hand-painted footwear.
Why Machine Washing Ruins Marker Art
Tossing custom sneakers into a washing machine destroys the marker artwork within minutes. The violent agitation and heavy tumbling bend the canvas fabric beyond its structural limits. When the shoe bends, the dried ink cracks and flakes off the cotton threads.
Hot water inside the drum breaks down the chemical bonds of the permanent marker pigment. Soaps and laundry detergents contain aggressive surfactants that dissolve the alcohol-soluble ink binders.
The washing machine cycle submerges the shoes in water for too long, saturating the canvas completely.
The mechanical spinning rubs the inked surfaces against the drum and other shoes, scratching off the pigment.
High-heat spin cycles force the wet fabric to warp, creating deep creases that shatter the sealed artwork.
Hand washing remains the only safe method to clean custom shoes without ruining the design. Take control of the cleaning process by using targeted wiping techniques instead of submerging the entire shoe.
Spot Cleaning Without Fading the Ink
Gentle spot cleaning targets only the dirty areas of the shoe while keeping moisture away from your artwork. Mix a teaspoon of mild dish soap into a bowl of cold water to create a safe cleaning solution. Dip a soft cloth into the soapy water, squeeze out the excess liquid, and wipe the plain canvas sections.
Avoid rubbing directly over the marker lines because friction lifts the softened pigment off the fabric. Pat the artwork dry with a clean paper towel immediately if accidental splashing occurs. Let the shoes air dry completely in a shaded area away from direct heat sources.
Conclusion
Customizing your canvas shoes with permanent markers is an affordable way to create unique footwear, but success depends entirely on proper preparation. Cleaning away factory residue, preventing ink bleed with the right technique, and applying a protective sealant ensure your design lasts through daily wear.
Gather your materials, test your markers on a scrap piece of fabric first, and start drawing with complete confidence.